The braking system is one of the most crucial components of a vehicle, ensuring the safety of the driver and passengers on the road. Timely replacement of brake pads and discs is vital for effective braking and preventing accidents. In this article, we will look at a step-by-step guide to replacing brake pads and discs, with special attention to safety rules and important nuances of the process.
How to Determine the Need for Replacement of Brake Pads and Discs
Timely detection of the need to replace brake pads and discs plays a key role in ensuring road safety and preventing serious damage to the braking system. There are several signs indicating the wear of these components:
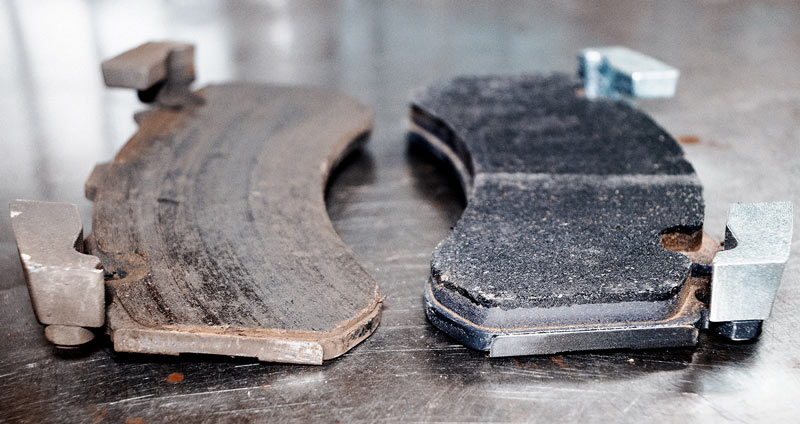
- Visual inspection. Check the brake pads through the special inspection window in the caliper or remove the wheel. If the thickness of the pads is less than 3-4 mm, they need to be replaced. Also, inspect the brake discs for deep scratches, wear, or uneven wear.
- Squeaking and grinding when braking. If you hear loud squeaks or grinding when pressing the brake pedal, it may indicate wear of the pads or damage to the discs. Do not ignore these audio signals!
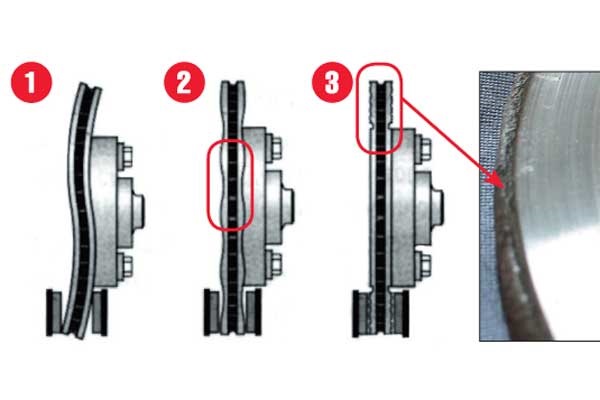
- Vibrations when braking. If you feel strong vibrations in the body or steering wheel when pressing the brake pedal, this may be a sign of deformation or warping of the brake discs.
- Increased braking distance. If you have to press the brake pedal harder than usual or the braking distance has noticeably increased, this may indicate wear of the brake pads or discs.
- Brake pad wear sensor. Some modern cars are equipped with a sensor that alerts the driver about the need to replace the brake pads with an indicator on the dashboard.
Regularly conducting these checks will help you timely notice signs of wear of the brake pads and discs. Their timely replacement will not only ensure safety on the road but also help avoid more serious and costly repairs in the future.
It is important to remember that the brake system plays a vital role in driving safety, and its maintenance should not be ignored or postponed. Regular professional technical maintenance is also recommended for timely detection of potential problems.
Problem Diagnosis Table for Brake Pads and Discs
| Symptom | Possible Cause | Required Action |
|---|---|---|
| Squeaking and grinding when braking | Wear of brake pads | Check and replace pads |
| Vibrations when braking | Deformation of brake discs | Check and possible replacement of discs |
| Black or blue exhaust smoke | Fuel-air mixture issues, possibly due to the brake system | Comprehensive diagnostic of the brake system |
| Increased braking distance | Wear of brake pads or discs | Check and replace pads and/or discs |
| Warning lights on the dashboard | Indication of wear of brake pads | Diagnostic and replacement of pads |
Preparatory Steps
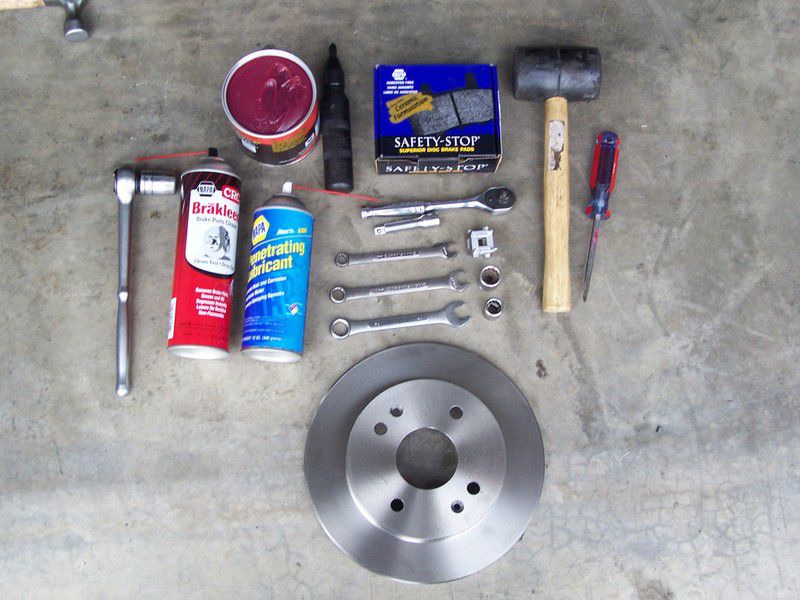
Before starting, make sure you have all the necessary tools and materials. You will need: wrenches, socket heads, a jack, wheel chocks, new brake pads and discs of the appropriate size and type for your vehicle. It is also important to follow safety rules, such as: parking the vehicle on a flat surface, using wheel chocks, and being cautious when working with heavy components.
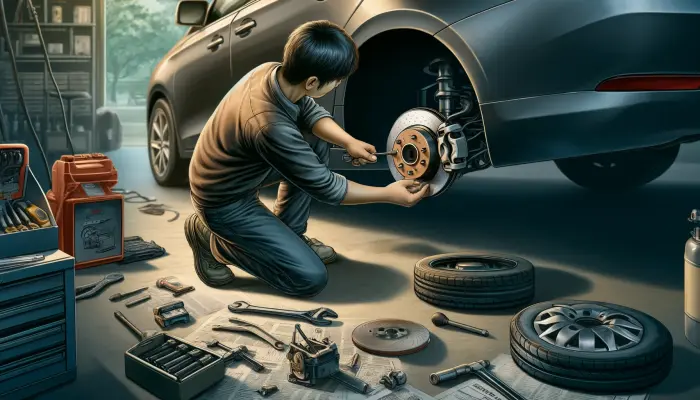
Process of Replacing Brake Pads

Replacing brake pads requires attentiveness and adherence to safety rules. Let's consider a detailed step-by-step guide:
Step 1. Preparation
- Park the vehicle on a flat surface and engage the parking brake.
- Use wheel chocks for safety.
- Gather the necessary tool: a wrench or socket head for removing wheels, a caliper remover, a wire brush and cleaning agents for cleaning, lubricant for guides.
- Purchase new brake pads recommended by the manufacturer for your vehicle. Ensure they are appropriate for the respective front or rear brake mechanism.
- To lift the vehicle, use a jack, placing it under the designated points. Also, set up support stands for added safety.
Step 2. Dismantling Old Brake Pads
- Remove the wheel on the necessary side of the vehicle.
- Find the brake caliper that holds the pads. It is usually attached by two bolts.
- Unscrew the caliper mounting bolts and gently pry it off with a flat screwdriver or remover to free the pads. Be careful not to damage the brake hose.
- Remove the old worn-out brake pads. If the linings are almost completely worn (less than 3-4 mm), it means the pads are worn out and need replacement.
Step 3. Cleaning and Checking Surfaces
- Thoroughly clean the inner surface of the caliper, pad guides, and adjacent areas of the brake disc, using a wire brush and special cleaners. Remove all dirt, rust, remnants of old pads.
- Check the condition of the brake disc. If there are deep scratches, significant wear, uneven wear, or deformation - replace it.
- After cleaning, apply a thin layer of high-quality brake lubricant to the caliper guides for smooth operation of new pads.
Step 4. Installing New Brake Pads
- Follow the manufacturer's instructions for installing new pads into the caliper. Proper orientation and clearances are very important.
- In some cases, a special tool may be needed to compress the caliper piston to make room for new pads. Do this gently without damaging the components.
- After installation, gently pull the handbrake lever to ensure the pads are properly positioned.
- Check that the pads slide freely in the guides and fit snugly against the disc.
Step 5. Final Actions
- Reinstall the caliper with new pads back onto the brake disc and secure it with bolts.
- Rotate the wheel several times to ensure the disc rotates smoothly without jamming.
- Reinstall the wheel and tighten the fastening nuts according to the manufacturer's recommendations.
- Repeat the procedure for other wheels.
After the replacement, it's necessary to check the brakes:
- Press the brake pedal several times. It should be firm and not sink.
- Check the braking at low speed. There should be no vibrations, squeaks, or other noises.
- New pads require a break-in period (about 300 km) to achieve optimal braking efficiency.
Process of Replacing Brake Discs
If brake discs also need replacement, start by dismantling the old discs. This may require the removal of the hub or other components depending on the car's design. Before installing new brake discs, make sure their size and type meet your vehicle's requirements.
Installing new brake discs involves their correct positioning and tightening with the recommended torque. After installation, adjustment of the gap between the brake pads and discs may be necessary to ensure optimal operation of the brake system.
Final Steps
After completing all work on replacing the brake pads and discs, it's important to conduct a thorough check of the brake system. This includes checking the brake pedal for travel and smoothness, absence of brake fluid leaks, and even braking at low speeds.
Additionally, new brake pads and discs require a break-in period over a certain time and mileage to fully bed in and provide maximum braking efficiency.
Importance of Regular Maintenance of the Brake System
Replacing brake pads and discs is an important part of vehicle maintenance and ensuring safety on the road. By following this step-by-step guide and adhering to all safety rules, you can replace them yourself and extend the life of the brake system.
However, in addition to timely component replacement, regular technical maintenance and inspection of the brake system by a qualified specialist are also crucial for ensuring the reliability and safety of your vehicle on the road.
Frequently Asked Questions About Replacing Brake Pads and Discs
Question: How often should brake pads and discs be replaced? Answer: The replacement of brake pads and discs depends on driving style, road conditions, and the quality of components. Typically, pads are replaced every 30,000-70,000 km, and discs every 60,000-120,000 km. It is recommended to regularly check the condition of these components.
Question: What symptoms indicate the need to replace brake pads and discs? Answer: Symptoms include squeaking and grinding when braking, steering wheel vibrations, increased braking distance, unusual noises during braking, and wear indicators on the dashboard.
Question: Can I replace brake pads and discs myself? Answer: Yes, with the appropriate tools and basic skills, you can replace the pads and discs yourself, but if you lack experience, it's recommended to consult a specialist.
Question: Is it necessary to replace the brake fluid when changing pads and discs? Answer: Not necessarily with every replacement, but brake fluid should be changed every 2-3 years or according to the manufacturer's recommendations.
Question: How do I check the wear of brake pads and discs? Answer: You can inspect the brake pads through the wheel arches and assess the thickness of the lining. Brake discs should be checked for deep scratches, cracks, or other damage.
Question: Can I use non-original parts? Answer: Yes, you can use parts from non-original manufacturers if they meet quality standards and fit your vehicle. But it's always best to prefer components recommended by the car manufacturer.